If you’re a dog owner, you know how important it is to provide your furry friend with a comfortable and safe space to call their own. That’s why building an A-frame dog house is a great project to take on. Not only will it give your pet a cozy shelter, but it will also add a stylish touch to your backyard. In this article, we will guide you through the process of building an A-frame dog house, step by step.
It’s all about the planning
To ensure the success of your project, it’s crucial to plan every step carefully. Start by considering the size of your dog and how much space they will need. While an A-frame design might not be suitable for larger breeds, it can be a perfect fit for smaller dogs. Take the time to choose the right materials that will withstand the test of time and weather conditions. Investing in high-quality materials will save you time and money down the line.
Building the A-Frame Dog House
The first step is to build the frame of the floor. Cut the 2×4 slats to the right size and secure them together using galvanized screws. Make sure the corners are right-angled to prevent the wood from splitting. Enhance the rigidity of the frame by adding waterproof glue to the joints. Attach a piece of plywood over the joists using galvanized screws.
Next, it’s time to build the rafters. Cut the ends of the rafters at the right angle and assemble them together with screws before fitting them into place. Install wooden blockings between the rafters for added support. Attach the faces to the structure, aligning them properly and securing them with screws.
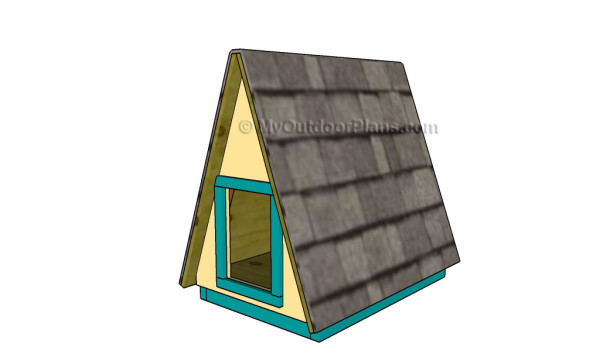
To provide protection from the elements, attach the roofing sheets to the rafters using galvanized screws. Make sure the sheets overhang the faces of the dog house to prevent water damage. If you want to add a finishing touch, you can fit trims around the door opening using galvanized screws.
To ensure longevity, cover the roofing sheets with tar paper and secure them in place with staples. Install asphalt shingles over the tar paper, starting from the bottom left of the roof. Don’t forget to add drip edges to ensure proper water drainage.
Lastly, take care of the finishing touches by filling the pilot holes with wood putty and sanding the surface. To protect the wood, give the dog house a few coats of paint.
Frequently Asked Questions
Q: Can I modify the size of the dog house to accommodate a larger breed?
A: Yes, you can modify the base of the dog house to create more space for your pet. We recommend adjusting the size and design of the A-frame dog house to meet your specific needs.
Q: How long will it take to build an A-frame dog house?
A: This project can be completed in one day, depending on your level of experience and the tools you have available.
Q: Can I personalize the dog house?
A: Absolutely! You can customize the A-frame dog house by adding a coat of paint or stain, or even by incorporating your pet’s name on the exterior.
Conclusion
Building an A-frame dog house is a rewarding project that combines functionality and style. By following our step-by-step instructions, you can create a cozy and safe shelter for your furry friend. Remember to consider your dog’s size and needs when planning the dimensions of the dog house. With a little bit of time and effort, you can provide your pet with a comfortable space they will love. For more outdoor project ideas, visit Pawsoha and explore our step-by-step projects.